They’re at our mercy. Plants, that is. After being nurtured from infancy in the richest of media and optimum conditions, the youthful plants land on a local garden center shelf, hopeful for a family of their own.
Ideally, a new plant will be promptly and carefully planted in just the right spot, watered regularly, become well established and go on to lead a happy life. However, a few missteps can cause its demise. The cause of death may vary. It can become dehydrated or frostbitten; drowned, smothered or even strangled.
Plants are extremely vulnerable in those little pots and ought to be planted as soon as possible after being brought home. It doesn’t take much to dry them up or freeze them out. If they must be held for a time, stick them in a protected place and see that they’re watered regularly.
The first thing to do is study its plant tag to see how tall and wide it will get and how much (or how little) sun it needs.
Next, dig a hole twice as wide and at least 6 to 10 inches deeper than the pot. Make sure you fill it with rich, porous, organic soil. One idea is to mix the original soil with peat moss and composted manure before putting it back. Clear surrounding weeds that may vie for its nutrients and moisture.
The next couple of steps are where things can go really wrong.
Make sure the pot soil is moist before sliding out the plant as carefully as possible; refrain from pulling on the plant itself. It may be that the plant has become root bound to the extent that the roots have swollen tight against the pot or have grown out the holes at the bottom. If you can’t loosen it by rolling the pot gently against the ground, it may be necessary to saw off the bottom of the pot.
Once out, a close examination is needed.
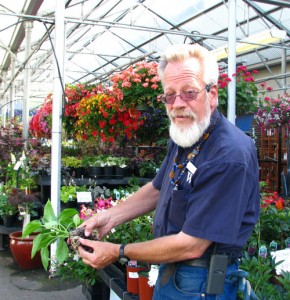
“Root bound plants are those that have a thick cake of roots at the bottom and can also be so on the sides,” said Dale Small, Garden Area Specialist at Wilco Farmers Co-op in Silverton. “The solid bottom should be gently sawed off and the sides roughed up a bit before planting.”
This happens more frequently in perennial plants; Small said most annuals will be fine if you use your thumbs to gently pry the bottom of the root mass apart, forming four small “feet.”
There’s a special danger to watch out for, in particular with perennials, shrubs and trees.
“When you take the plant out of the container, if you see roots that are encircling the others, you have to slice through them or they’ll continue to encircle them and the roots will never spread out correctly,” Small said. In short, the plant will strangle itself.
So, we’re all ready for planting, right? Don’t relax just yet!
Small says planting too deep is the major cause of plant death. All too many plants have perished; hard-earned money wasted due to plants being sunk just a few too many inches underground.
Special cases aside (tomatoes develop stronger root systems when the plant is placed as much as two-thirds underground), plants ought not to be planted deeper than the soil level of the pot in which it was received. Planting too deep can cause crown rot or prevent blooming. This isn’t as easy as it sounds, because after its initial watering a plant can sink below its intended level or heave up, leaving the roots exposed to dehydration, cutting down on the plant’s stability.
“It can blow over before the roots have a chance to take hold or knit,” Small said.
Tamp the soil down firmly but carefully. Often just a good direct watering will allow soil to penetrate the root area enough to start a happy union. Making a shallow depression around the plant will help channel water correctly at this first stage.
But, just to ensure your new plant gets off to a good start, Small recommends the good, initial watering be followed up with the application of a transplant shock reducer. His favorite is Liquid Fish.
“It has the complete trace minerals, all the B vitamins, and good mild nitrogen to get the plant started,” he said. “First, fully water the plants in and then apply the Liquid Fish mixture.”
You’ve done your job. Let Mother Nature take it from here.
